DIVIS TIP OF THE MONTH
Save scan images in ParcelVIS – with just one click!
Bordesholm, February 1, 2020
The Situation
You have investigated and found a scan event in ParcelVIS using the parcel label number and are now looking at an overview of the existing video recordings for the shipment number you have been searching for.

Fig.: Overview of the existing video recordings for the package number with the video working area (scan image and working image)
In the video working area at the top left you can see two pictures. The scan image is displayed in the left window, i.e. the image taken at the scanning station at the time of the scan. On the right you see the so-called working image*.
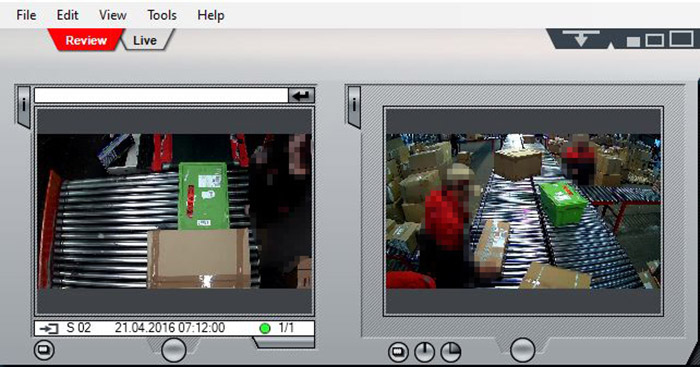
Left display: Scan image; Right display: Editing image
Now you want to save the scan image or any other video image from the investigation process in the film strip!
It's easy with ParcelVIS!
You can see the available options at the top right as an icon menu.
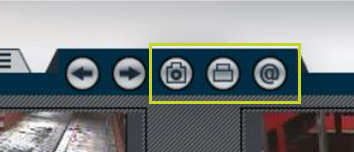
Fig.: Icon menu with further processing options
You can process the image results of your investigation using the icon menu as follows:
Save as JPEG
Print
Send via e-mail
Here’s how to save the image
Apply the icon menu to any image using Drag & Drop
The "save image" option can be conveniently applied to the scan image or any other image from the film strip using drag & drop.
To do this, hold the mouse pointer over the camera icon and press the left mouse button to "grab" the icon. Now hold the mouse button down, drag the icon over the desired image and drop it by releasing the mouse button (= drag & drop).
Now the “save image” dialogue opens and you can continue to save the image on your computer.
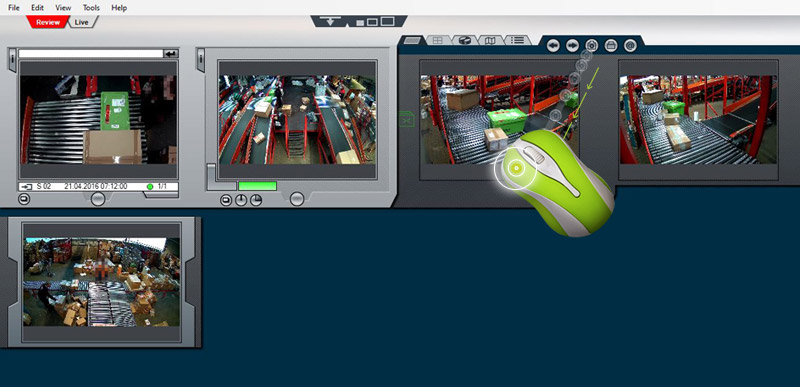
Fig.: Drag & drop the icon over any image
You can use drag & drop to apply any function behind the icons from the icon bar on the top right to your images and not only save the desired image, but also print it out or send it by email – simply with one click.
Apply the icons directly to the working image
If the desired image is already displayed as the working image (right image at the top in the video working area), you can apply all the icons from the icon menu directly to this image with just a click of the mouse.
In this case, just click on the camera icon in the icon menu.
Subsequently, a dialogue window opens again, in which this image can be saved as a file on your computer.
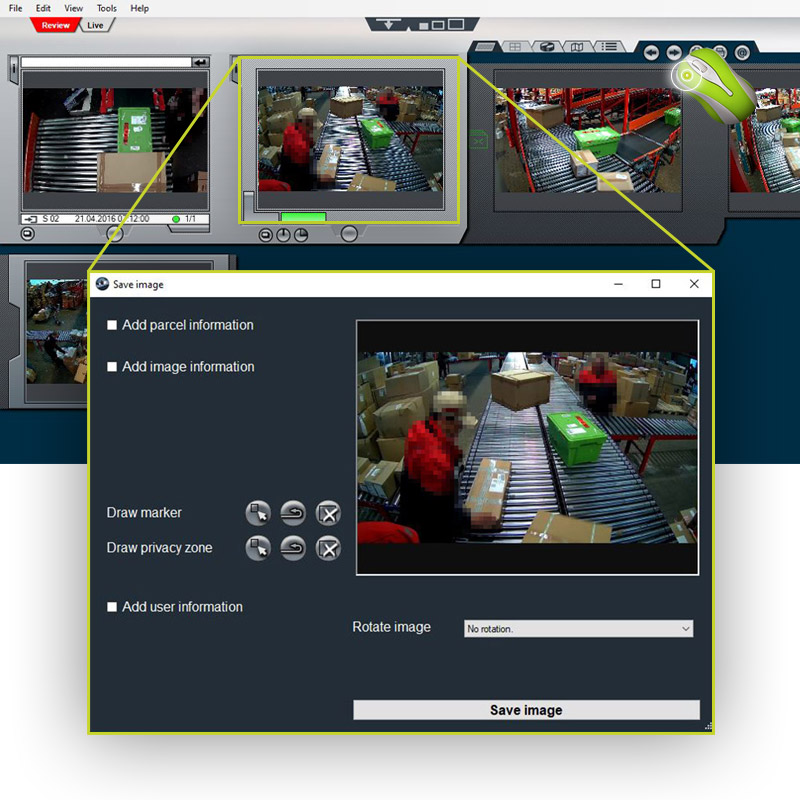
Fig.: The dialogue window for saving the working image opens after clicking on the icon in the icon menu
Additional information such as the tracking number, a user text and your company logo (if stored in the system) can also be saved along with the image.
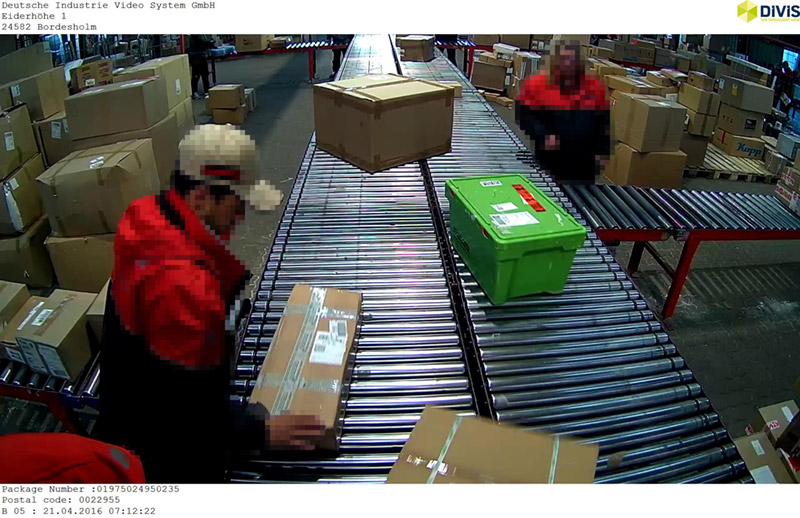
Fig.: Saved image with additional information
*Working image: At the beginning of the investigation, the scan overview image is always displayed as a working image in the right window of the video working area. This display changes in the course of the investigation. If, for example, the parcel is missing in the subsequent picture or is difficult to identify, the previous picture, on which the parcel can still be clearly seen, can be brought to the video working window for editing with a double-click. From there, the research can then be adapted and continued.


