DIVIS TIP OF THE MONTH
Export video sequences in CargoVIS & ParcelVIS
Part 1: Evaluate and export investigation results
Bordesholm, June 1, 2019
You have successfully investigated a shipment in CargoVIS or ParcelVIS. Now you want to export and archive the entire consignment tracking result, for example, as proof, regardless of the ongoing video recording. Our software offers a powerful export function, which we explain today - using the example of ParcelVIS.
After the investigation has been completed, start the export by clicking on the icon "Export review" in the workspace register.

In the tab for the export, the search processes recorded by the ParcelVIS software in the background, including the shipment information (shipment number, etc.), are displayed by thumbnails. A complete investigation usually consists of several camera positions. Starting with the input scan or bridge scan over belt sections, down to the business area. If there are more images than can be displayed on the visible monitor field, a scroll bar will appear, allowing you to navigate further down the material.
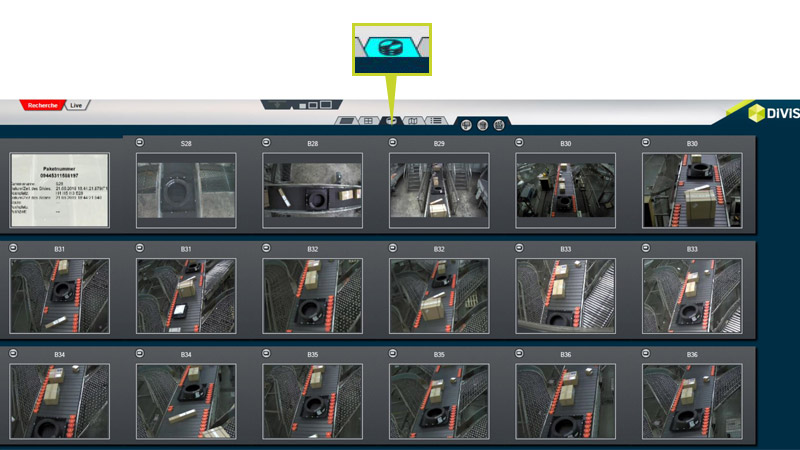
Fig.: To export in the search mode, click on the tab “Export review”. The sequences of the search are displayed as thumbnails.
In the working area for the export of the search, you will see the video images of all investigated sequences. If you do not want to make any changes to the material and want to export it completely, just click on the movie camera or the film slate icon, depending on the desired video format, to export all displayed sequences in one step.
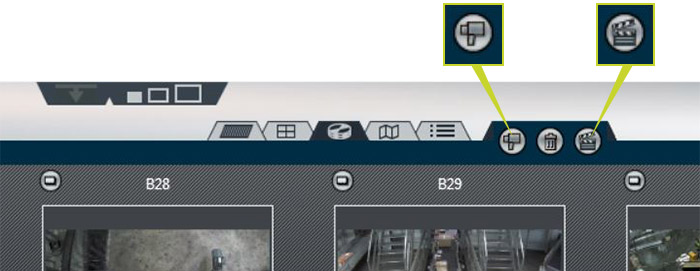
Fig.: Export buttons
For your export you can choose between two video formats:
Save sequence
All active parts are exported and stored in PTD or PTD2 format, which can be played back using DIVIS' VISPlayer.
Save sequence as AVI file
All parts are exported in the common AVI format, which can be opened with the preinstalled Windows Media Player.
You only want to export certain parts of your investigation? No problem.
The following settings are available to you before exporting:
Disable selected sequence
Version 1
In the workspace, select a thumbnail of the video sequence you want to exclude with a mouse click (left mouse button). A red frame will appear and mark the clicked thumbnail.
Then click on the trash can icon to exclude the selected sequence from the export.
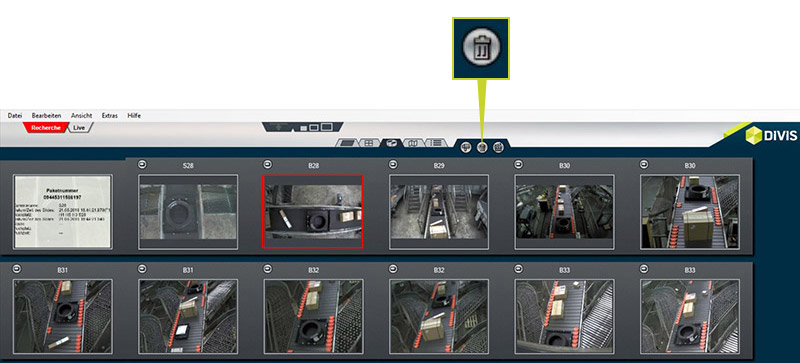
Fig.: Left mouse click marks a sequence (indicated by the red frame). By clicking on the trash can icon, the selected sequence can now be excluded from the export.
Excluded video sequences are indicated by a transparently white overlaid thumbnail. To include excluded sequences in the export again, click on them again (left mouse button) so that the red frame reappears. Then click on the trash can icon again to activate these sequences and include them in the export.
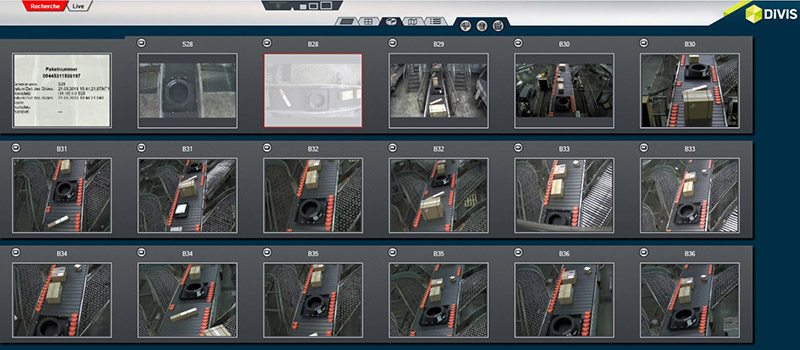
Fig.: Sequences that are excluded from the Export are overlayed with a transparent white.
Version 2
Hold the mouse pointer over the preview image (thumbnail) of the sequence you want to exclude and open the context menu with the right mouse button (see below).
Here you have the option "Hide this part" or “Show this part“, depending on whether the selected sequence is currently included or excluded from export.
Further options in the context menu of the sequences
The context menu is opened with a right-click on the respective preview image and offers you various editing options for the individual video sequences.
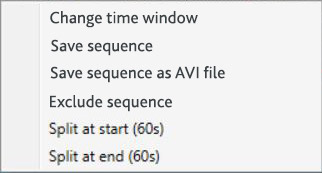
Fig.: Options in the context menu
Change time window
With this option you can open the selected sequence in a separate window and, if necessary, change the time span, meaning start time and end of the sequence. In the single view of the sequence, you can freely move back and forth to view the contents and make your changes.
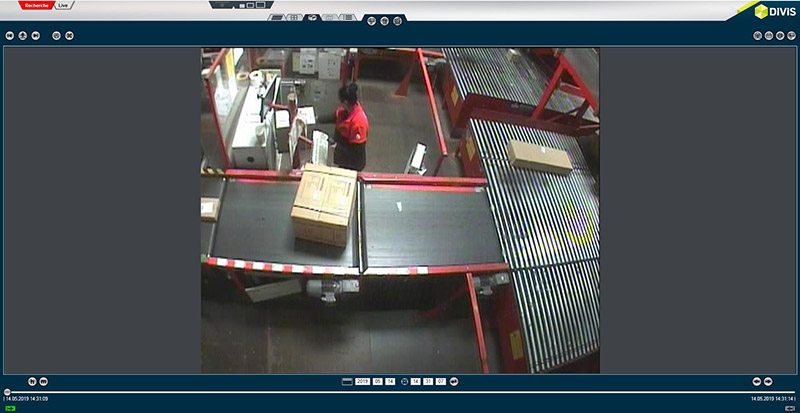
Fig.: Single view of a sequence. Start time and end of the sequence can be set here.
Save this part
This menu option allows you to select individual sequences for export.
By right-clicking on the desired sequence and selecting "Save this part", only this sequence will be exported (in PTD format).
Save this part as AVI
Saves only the selected sequence in AVI format.
Hide this part
Excludes the selected sequence from the export.
Show this part
Includes a previously hidden sequence in the export again.
Split at start / Split at end
Splitting a (sufficiently long) sequence after a configurable time (default: 60s) at the beginning or at the end.
Export dialog
Click on the camera icon to open the export dialog. Here, the location and name of the exported file can be set.
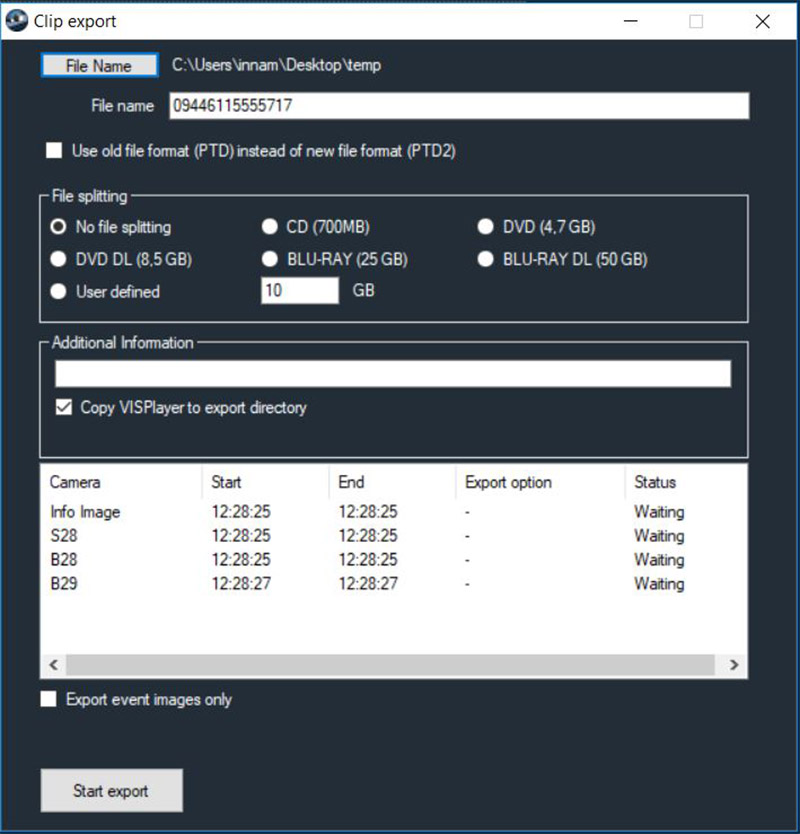
Fig.: Export dialog
In addition, before exporting the maximum file size can be defined and additional text information can be placed.
To complete the export, click on the "Export" button. The generated PTD file can be played on any Windows PC with the DIVIS VISPlayer.
If you prefer to export your data in AVI format, click on the film slate icon instead of the camera icon.
In the following dialog you can specify the location and name as well as the resolution of the video sequences to be outsourced and the frame rate (frames per second). Finally, click on the "Start" button. The generated AVI file can be played back on any Windows PC with any AVI player (Windows Media Player, VLS Media Player etc.).
NOTE: Low frame rates can cause playback problems, especially in Windows Media Player. Therefore it is recommended to choose at least 5 frames per second.
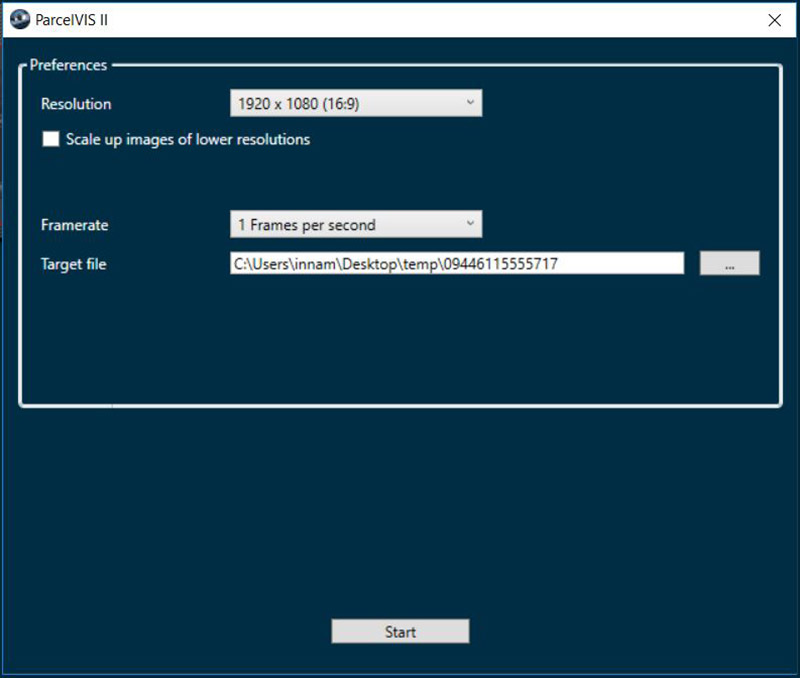
Fig.: Defining the resolution and storage location in the export dialog
Export of video sequences in CargoVIS & ParcelVIS Part 2: The detail view

Find palletized shipments quickly with CargoVIS
With our video management software for cargo handling, CargoVIS, we offer you a comprehensive and easy-to-use system solution for the image-controlled investigation and tracking of palletized goods.

ParcelVIS for CEP providers and HUBs
Save time and money and let ParcelVIS work effectively for you with image-based consignment investigation in the transshipment warehouse: Entering the parcel label number is your key to all information on the whereabouts and status of a consignment during all scanned events.


