DIVIS TIP OF THE MONTH
Shipment investigation with panorama cameras in CargoVIS
Quick and easy investigation in the 360° view with the Z-key zoom
Bordesholm, May 3, 2020
The CargoVIS software supports the use of high-resolution 360° panorama cameras. By default, the display of the circular camera image is set up to completely fit into the available image section.
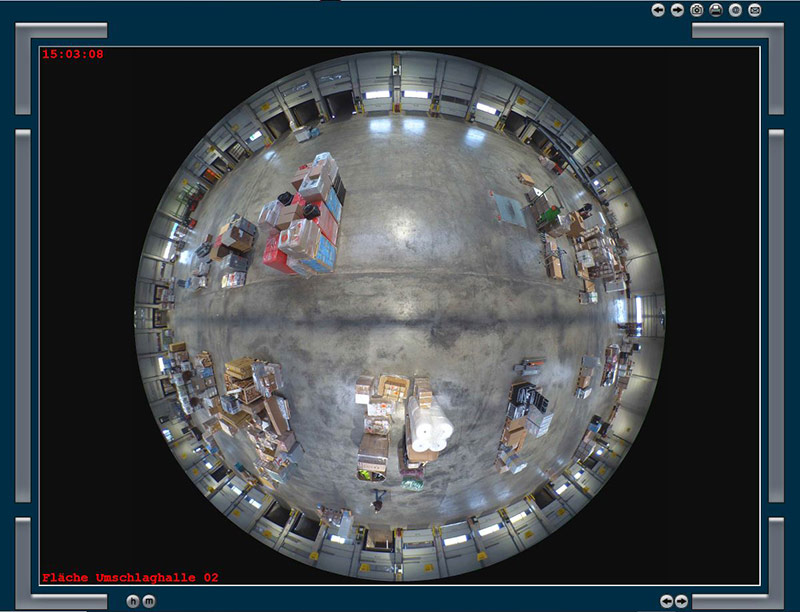
Fig.: General view of the 360° panorama camera
In this view, the visual orientation during the shipment investigation would normally be difficult, since the image not only shows a lot of content, but the content in the lower half of the image is also displayed upside down. In just a few simple steps in CargoVIS, you can use the full potential of details in a 360° image without losing orientation.
Today we will show you how you can very easily zoom into the high-resolution image of the 360° panorama camera with the Z-key on your keyboard and do so in the exact part of the image in which you want to start your search.
Simply zoom in on image sections with the Z-key
To use the zoom with the Z-key, move the mouse pointer over the area to which you want the zoom to be applied. The area selected in this way can now be enlarged by pressing the Z-key. The enlarged view is displayed as long as the Z-key is held.
A green magnifying glass symbol is displayed at the top right of the camera image to signal the activated zoom function.
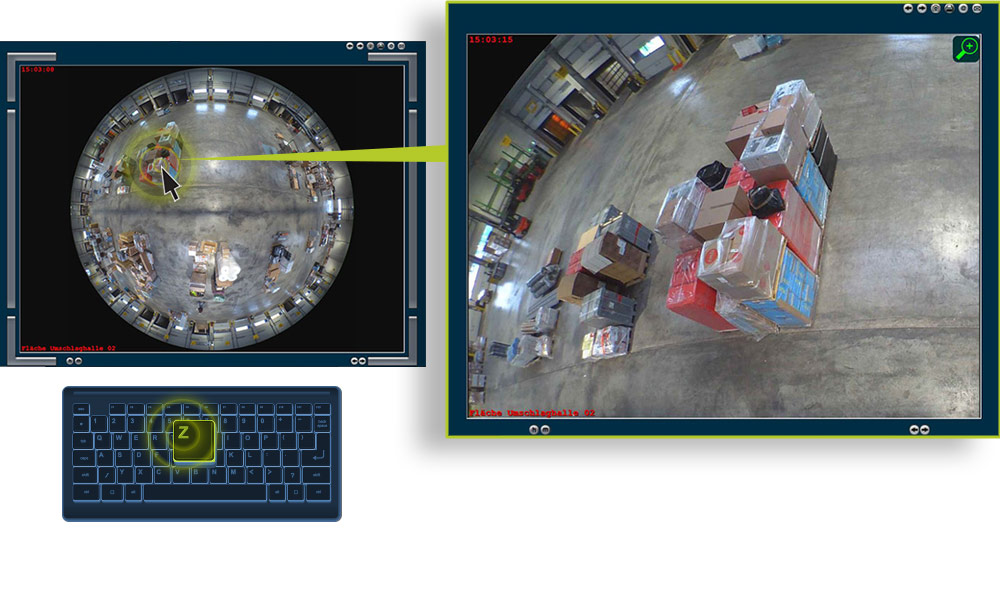
Fig.: Zoomed in image section from the 360° panorama view with the Z-key held down
Move through the image in zoom
In zoom mode it is also possible to move back and forth in the camera view. To do this, the Z-key must be held down and the mouse pointer must be moved over the desired area at the same time.
For example, if you are in zoom mode at the top right of the camera view, but would like to search content in the area at the bottom right, hold down the Z-key and move the mouse pointer on the image in the desired direction. The image section will be adjusted accordingly.
While you can zoom in on the currently displayed image by moving the mouse pointer, moving the mouse wheel (scroll back and forth) in zoom mode allows you to move backward and forward in steps of seconds in the recorded video material.
A shipment, once identified in the zoomed in section, can then be tracked through the zoomed footage by scrolling the mouse wheel.
In order to be able to easily investigate in the parts of the circular image that are tilted to the side or displayed upside down, the display rotates automatically so that the content in the displayed section is always displayed in an upright orientation.
Various settings are available in CargoVIS for rotation of the image sections.
By default, the rotation is set in steps of 90°. The view is divided into four parts by invisible “borders” crossing diagonally across the center of the picture (see image below). There is no rotation taking place in the middle of the picture. The view rotates automatically whenever you move the mouse pointer in the marginal areas of the display and reach the next section.
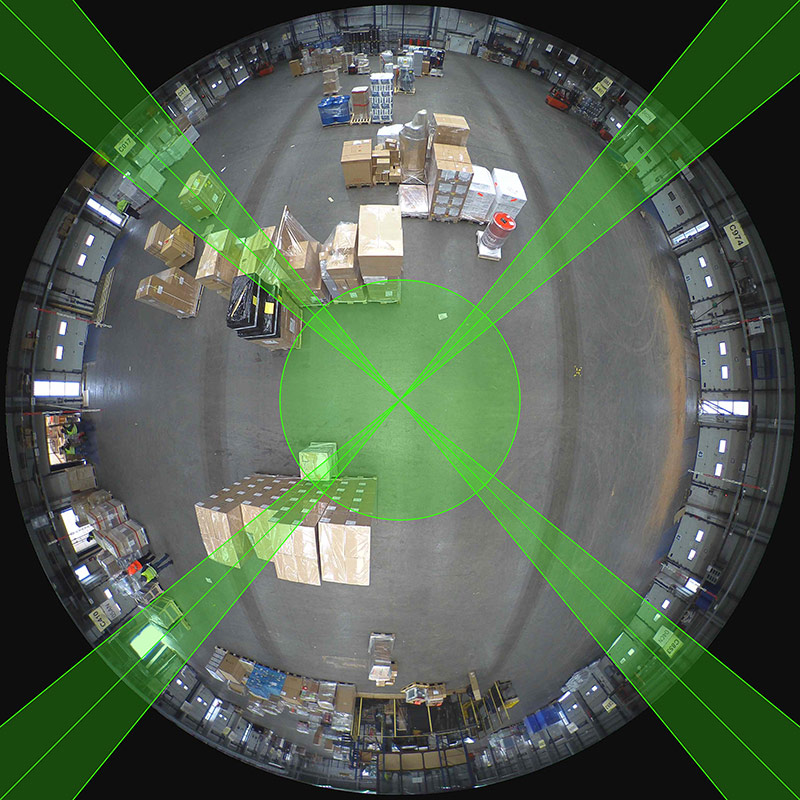
Fig.: Diagonal borders for the automatic step-by-step rotation of the image content in the 360° view
You can individually adjust the rotation steps under the menu item "Edit". To do this, select "Settings" from the dropdown menu.
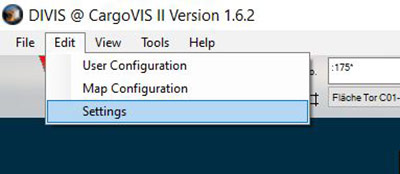
Fig.: Select the "Settings" item under "Edit".
In the dialog for the settings hit the tab "Behavior" and choose between rotating the view by 180° instead of 90° or deactivate the automatic rotation completely.
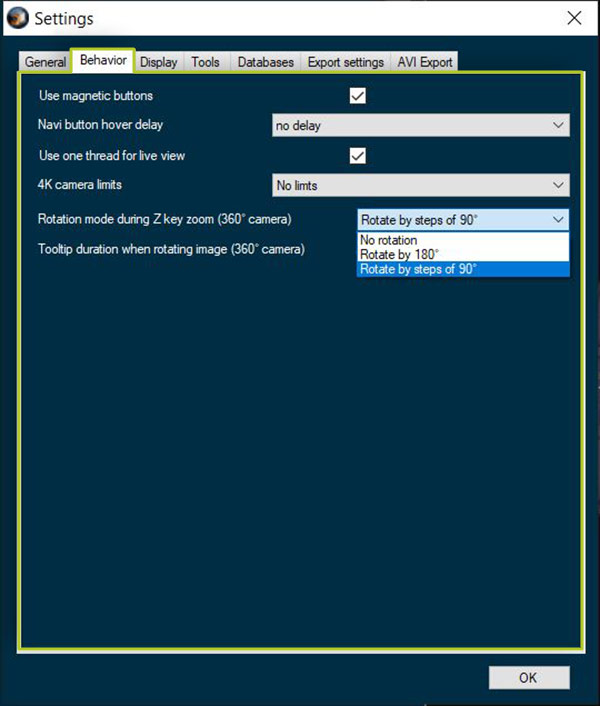
Fig.: Dropdown for setting the rotation under the "Behavior" tab
The rotation is indicated by a red arrow on the green magnifying glass symbol. In the example below, the image section has been rotated by 180°.
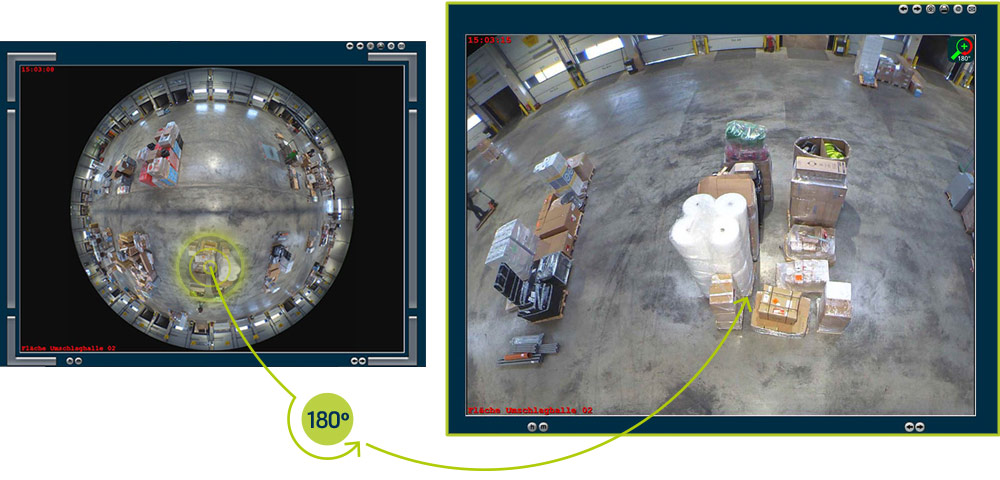
Fig.: Image section was rotated by 180°.
Leave zoom
You can stop zooming simply by releasing the Z-key. The illustration changes back to the circular 360° overall view.
In this image, a red frame also appears as a marking around the area that was last shown in zoom.
If you leave this area during further investigation, the red frame disappears.
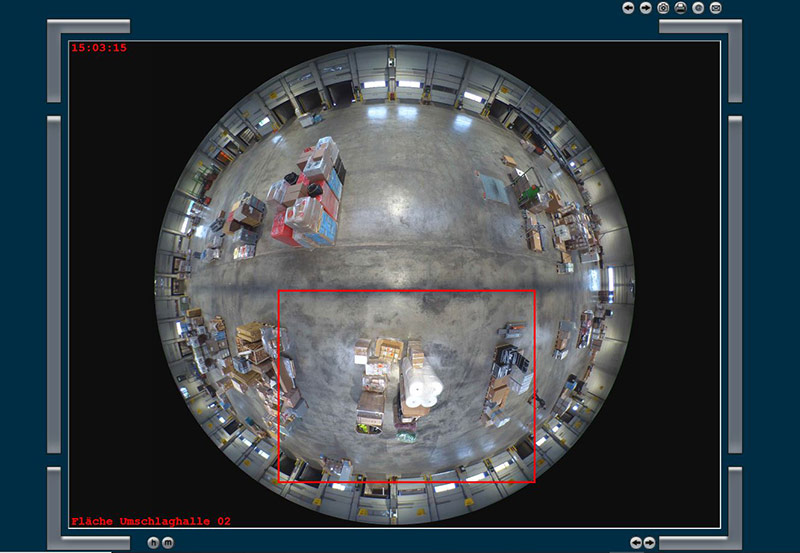
Fig.: Red frame marks the last zoomed in area
Process the search area
As long as the red marking around the last zoomed area is visible, this section can be processed further. The options "Save", "Print", "Send by e-mail" or "Generate letter" can be selected via the icon menu at the top right.
Important: In the following dialog for the individual functions (for example when saving) the point "Export selection only (red frame)" must be checked, otherwise the complete 360° view will be used for the respective step.
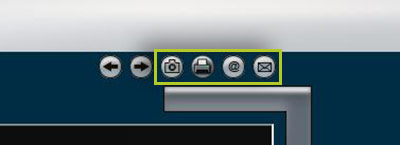
Fig.: Further processing options for the image section

