DIVIS TIP OF THE MONTH
Site plan overview in CargoVIS and ParcelVIS
Complete overview of your logistics hall or your parcel depot
Bordesholm, June 7, 2020
No site map is required for shipment investigation in CargoVIS and ParcelVIS. Yet, our software for video management in logistics also helps you to keep the best possible overview beyond the shipment investigation. A site map can be helpful, for example, if you want to go directly to a certain area (gate, entrepreneur area, entrance area, certain sections of the sorting line, etc.) to take a closer look.
The site plan view integrated in our software for such purposes provides a complete overview of your entire logistics hall or your parcel depot. In this view you can select and view individual areas as needed and you also have an overview of the positions of the cameras installed in the currently activated area.
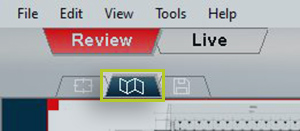
Fig.: Switch to site plan view (only with single monitor operation) in CargoVIS

Fig.: Switch to site plan view (only with single monitor operation) in ParcelVIS
If only one monitor is connected to the respective work computer, you can easily switch to the site plan using the tab. If two monitors are connected, the site plan is permanently displayed on the second screen.
Selection of areas in the site plan
All selectable areas are marked with green and red frames in the site plan. After double-clicking the button of one of these areas, you will automatically be directed to the area search view, in which the selected area is displayed with the video images.
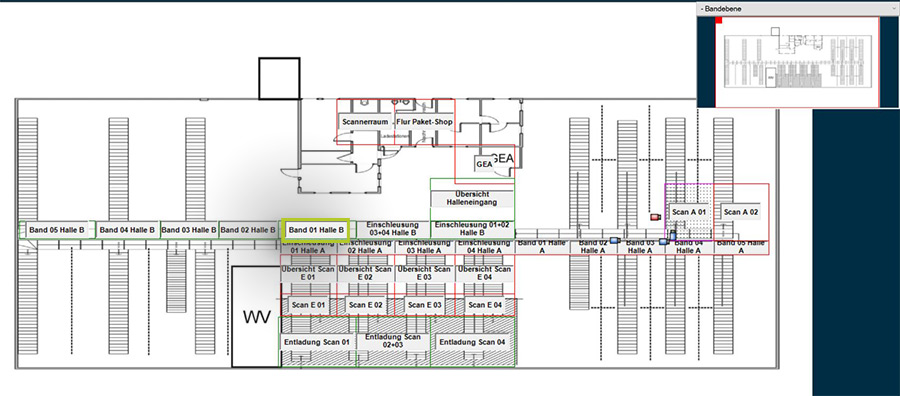
Fig.: Selection of an area by double-clicking the button of the area
The area selection is marked in the map by a thin magenta coloured frame.
All cameras that are activated in the selected area are also marked (RED = main camera, BLUE = secondary camera).
It is not possible to select individual cameras in the site plan, since the connection is always area-oriented. Every area is assigned all cameras of the configuration that can display the area accordingly.
Site plan settings
When you right-click anywhere on the map, a context menu opens with setting options for the map:
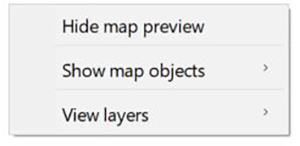
Fig.: Context menu
Show / hide preview plan
If you want the complete site plan to be displayed permanently, you can click on the corresponding menu item "hide preview plan" in the context menu.
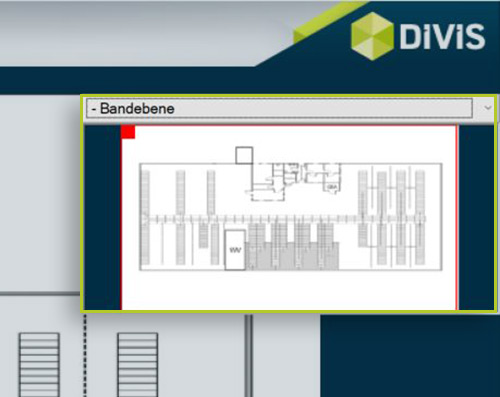
Fig.: Preview plan with red zoom window in the starting position
If you also want the preview plan to be displayed, this item can be placed in various locations. Clicking the right mouse button while hovering over the preview plan opens the corresponding context menu to set the position.
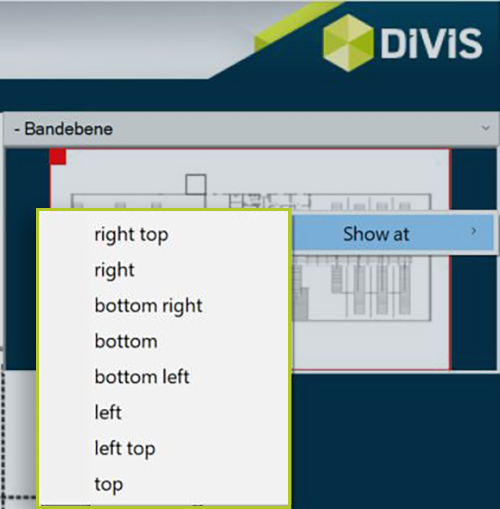
Fig.: Position of the preview plan
Plan display
Under the menu item "Map view" you can select whether the cameras and the areas should be displayed.
If you use our License Plate+ module, you can also activate the menu item "Show barrier controls" to display the barrier controls.

Level selection
Different levels can be used for an optimal overview, for example:
- Main level: Overview of all entrance and gate areas
- Overview level: Overview of the hall with 360° cameras
- Area level: Overview of the area with hallway cameras and virtual sections of the 90° cameras
- Outside level: Outside cameras
When our experts configure your new DIVIS system for the first time, the levels are defined and named individually according to your needs. In the example for CargoVIS and ParcelVIS below you find such an individualized configuration.
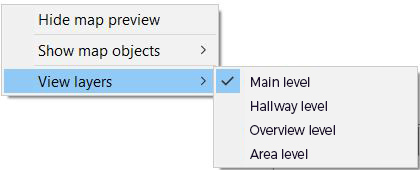
Fig.: Individualised level view in CargoVIS
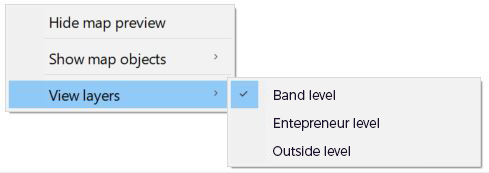
Fig.: Individualised level view in ParcelVIS
The display of the site plan automatically adapts to your search. Depending on which level you are currently on in the shipment investigation, that level is also automatically adopted in the site plan. If you selected, for example, a hallway camera, the area level is automatically shown in the map.
Zoom function in the map
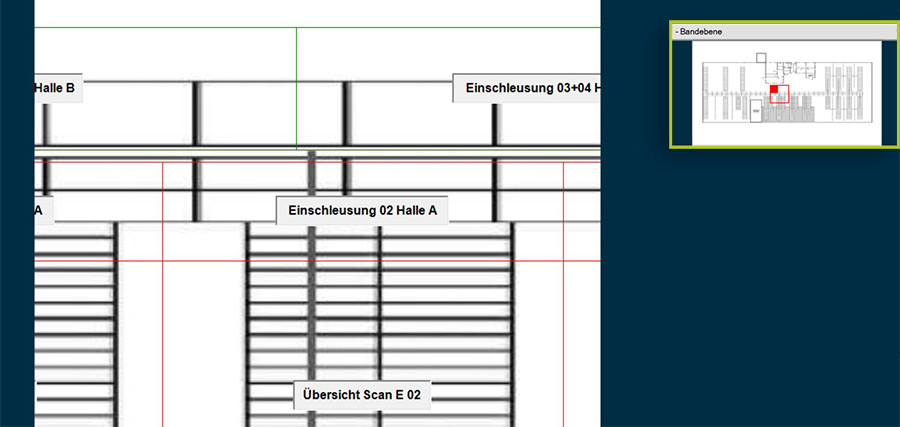
It is also possible to zoom in on areas of the site plan using the preview plan.
For zooming, drag a rectangle on the preview map while holding the left mouse button to define the desired area. Then release the mouse button.
After releasing the mouse button, the site map is automatically zoomed in at the corresponding point.
Move the zoom section
In zoom mode, the zoom window in the preview plan can also be moved. To do this, press the "Ctrl" key on your keyboard and "grab" the red frame with the left mouse button. Hold down both buttons and move the mouse to the desired position.
Reset zoom
Leave the zoom simply by pressing the right mouse button. In the appearing context menu you can select the "Reset zoom" option.
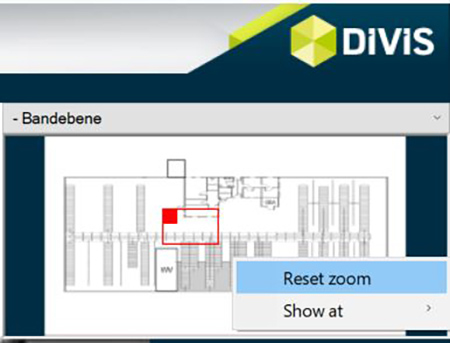
Fig.: Reset zoom with the right mouse button over the preview plan


